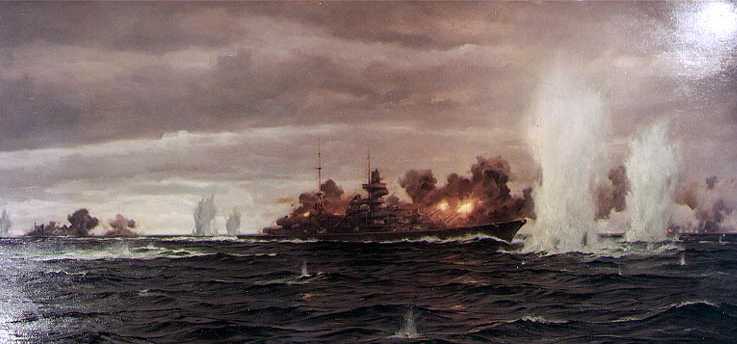
 |
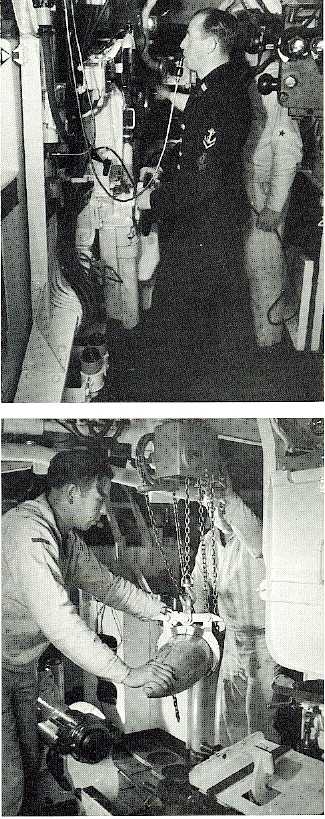
Chief Petty Officer gun captain at quarters
firing. The tube in his mouth is the firing mechanism and there is
a second trigger on the wheel he is holding.
Emergency loading of 20.3 cm (8") shell from ready-use rack. The forward part of the rammer can be seen at lower left. |
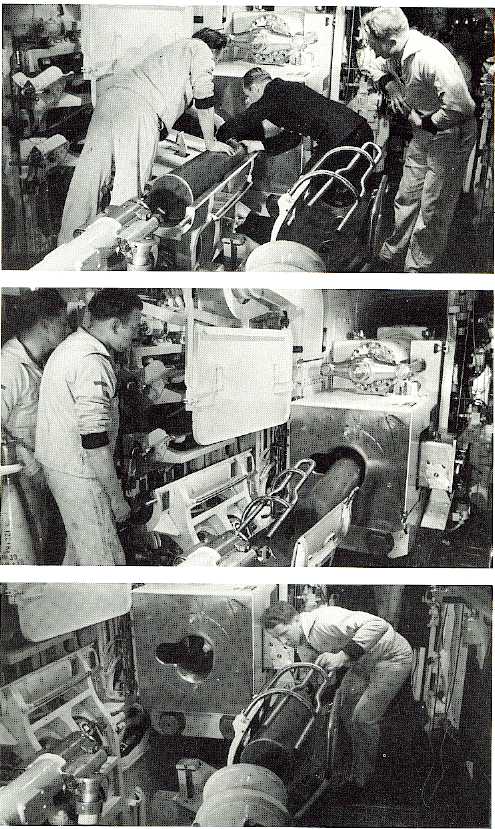 |
Preparing to ram home the Hauptkartusche
or main charge. The rammer is in the left-hand corner. The
framework between the two right-hand crew members is the spent case transfer
tray.
Empty case being ejected from breech onto
ejection transfer tray. Note ready-use shells on the left.
The breech end of the right-hand gun in one of the turrets. The crewman is ejecting a spent cartridge case down the disposal chute. At the bottom left is the rammer, while above and to the left can be seen the shell loading tray adjacent to the ammunition hoist. |